Getting Started with VamaNet.members
Logging in to the Member’s section:
1.
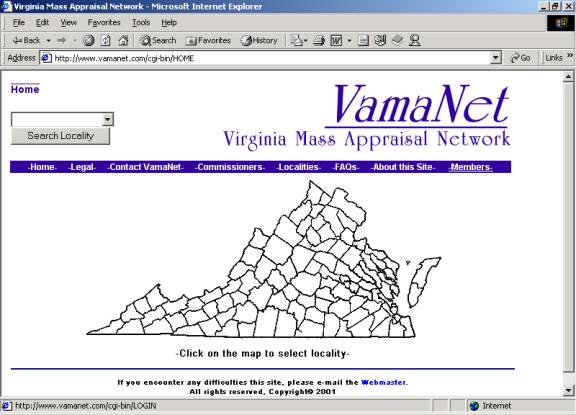
Direct
your browser to www.vamanet.com. Be sure to use the Address line of your
browser and not the search field of a Search engine (such as MSN or Yahoo!)
2.
On
almost every page there will be a Blue navigation bar under the VamaNet
logo. On the right hand side of this
logo you will see a –Members- option.
Click on this option and you will go to a Members Only login screen.
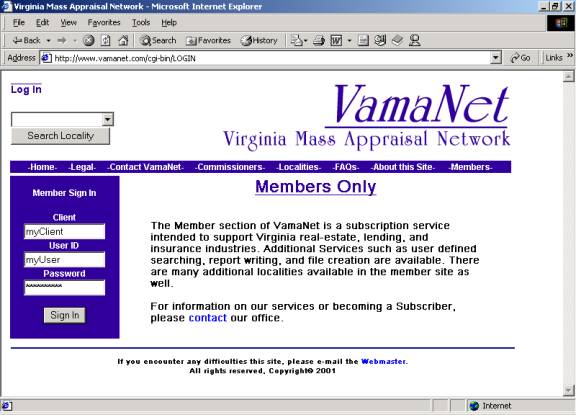
3.
Logins
require three pieces of information: Client ID, User ID, and Password. These fields are not case sensitive. The Client ID will be the same for every
user in your organization. Your User ID
should be issued by your Administrator.
Your initial Password will be the same as your User ID (you can change
it to something more familiar once you get logged in). Enter your login information in the fields
provided on the left of the screen and click the “Sign In” button.
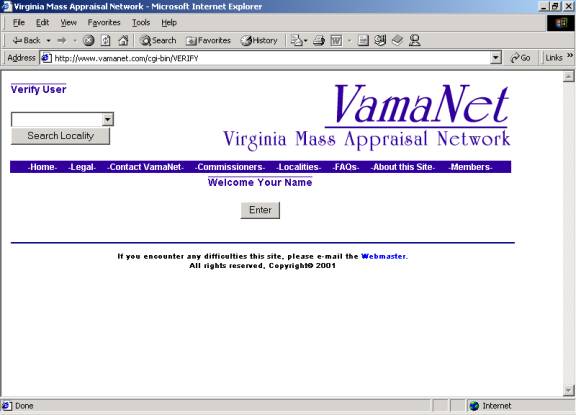
4.
If
your login information is verified you will see a “Welcome (your name here)”
and an Enter button. Click the
“Enter” button to begin using the service.
**If your login information is
incorrect you will see a message on the screen telling you what was wrong. Should you encounter this problem, you probably
mistyped something or are using an incorrect password. Double check your login information and try
again.
Using the HOME page:
1.
After
you have entered the system, the first page you will come to is the Member’s
Home page. This is also referred to as
the “Current Environment” screen. NOTE:
You can quickly return to this screen at any time from within the Members
section by clicking -Home- on the left hand side of the Blue navigation bar.
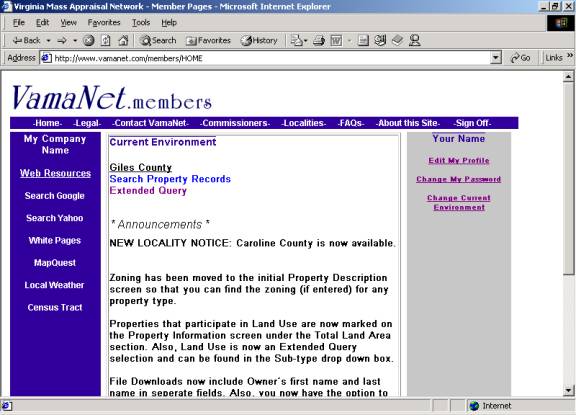
2.
The
Home page has 3 sections. From left to
right they are the blue “Web Resources” section, the white “Current
Environment” section, and the gray Administration section.
3.
The blue section has additional helpful links to
various web pages to assist you in searching for information. Of particular note are “Local Weather” which
sends you to the Weather.com page for your zip code and “Census Tract” which is
the government (FFEIC) web page for searching for Census Tract information.
4.
The white section is the section you will use most
frequently.
Locality Name - Under Current Environment will be a locality name. This is the locality you are currently
signed into for searching. (To change
to another locality see the “gray” section: Change Current Environment.
Search Property Records – Use this option to search for
individual property records. Individual
property detail includes building, land, improvements, sales, and legal
information. Additional capabilities
include building sketches, *pictures, *tax maps, and Census Tract
information. *where available. See the “Using Search Property Records”
Section below for details.
Extended Query – Use this option to build specific search result sets
matching a set of user specified criteria.
This option allows you to search records, print a report, and create
downloadable spreadsheet files. See the
“Using Extended Query” Section below for details.
Announcements – The announcement section is where we publish program
change and enhancements. We also post
new locality notices and recent locality updates. Be sure to glance through this whenever you sign on to stay
abreast of all the latest VamaNet news.
5.
The gray section is an administrative section.
*NOTE – All of these functions appear in popup windows. If you choose to update any of these screens
you will receive a confirmation notification letting you know that the action
was performed. Click the “Close” button
to close the window. Some of the
actions will cause the screen to refresh, so if you see a message in a popup
window like so:
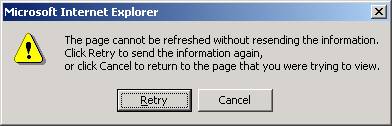
either press the “Enter” key on
your keyboard or click the “Retry” button.
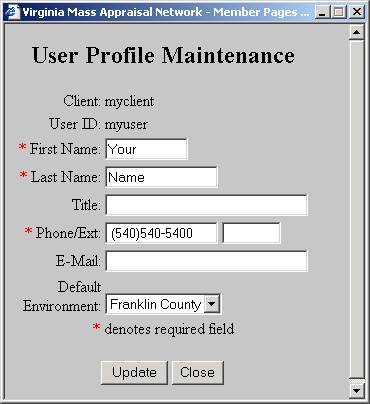
Edit My Profile – Click on this link to view and change your personal
information such as phone number, e-mail address, name, and title. You can also change your Default
Environment. Your Default Environment is
the Locality you initially sign into at login time. If you are subscribed to only one locality this should be set to
the locality you are subscribed to: if you have multiple localities you may
change this at any time to any of the localities to which you subscribe.
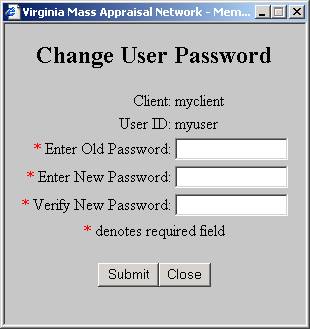
Change My Password – Click on this link to change your password. Simply enter your old password once and your
new password twice and press “Submit” to make the change. If you forget your password, your
administrator can assign a new password without knowing your old one.
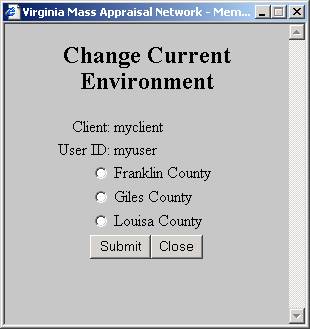
Change Current Environment – You can change the locality you
are working in by clicking on this link.
The list of your subscribed localities will be displayed, simply select
the one you wish to change to and click the “Submit” button.
Administrator – If you are an administrator you will see a link for
accessing the Administrator functions.
Through this link you can change, add, and delete users, create users,
and assign new passwords. You can also
change client information such as your company contact, phone numbers, company
name, etc. If you require assistance
with this section please contact customer support.
Using
Search Property Records
- Click on the “Search Property Records” option from the Home page.
- The Search Property Records screen will appear like so:
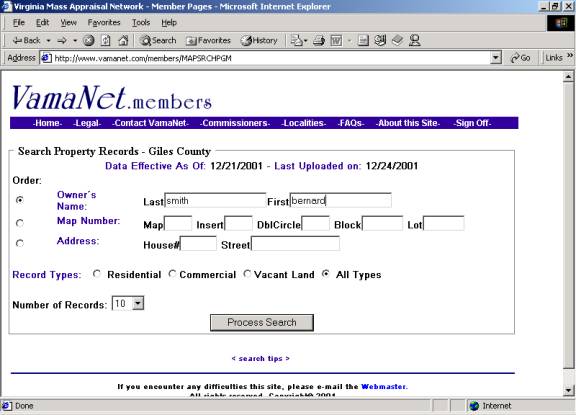
- The upload date will tell you when the data was last updated from the locality to VamaNet.
- Select which method you want to use to search, Owner’s name, Map Number, or Address.
- Select which record types you wish to include. The default is ‘All Types’.
- Select the number of records you would like to return: 10, 25, 50, 100, or 500.
- Once you have entered your selections, click the “Process Search” button. The Search Results screen will appear:
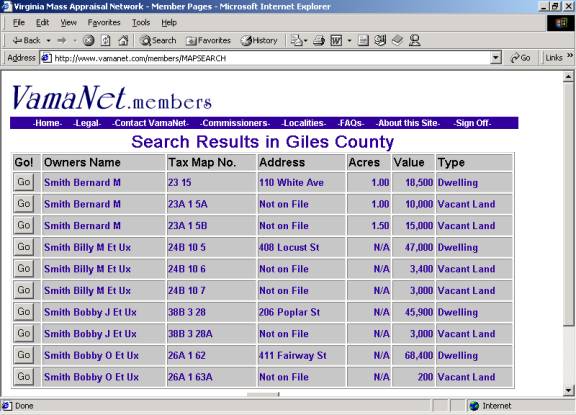
- Click the “Go” button by the property you wish to view. You will be taken to the Property Information screen.
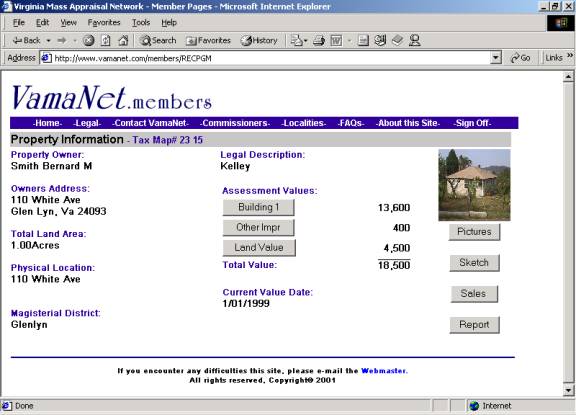
- Clicking any of the buttons will give you another screen with more detail information. From any of those screens just click the “Back” button on your browser to return to this page. The “Report” button will give you a black and white page intended to be printed out on a desktop printer and should fit on standard 8.5 x 11 paper.
Using Extended
Query
- Click on the “Extended Query” option from the Home page.
- The Work with Queries screen will appear like so:
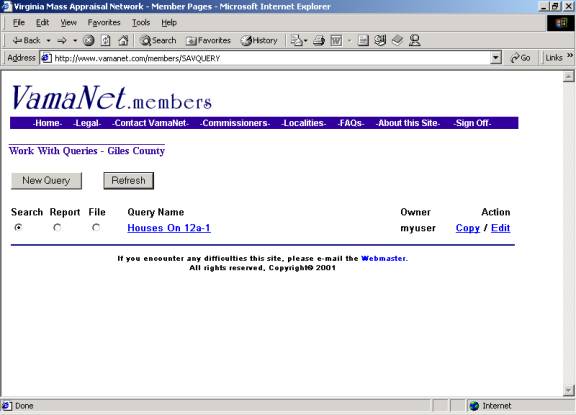
- As you develop your own queries you can save them for later use. They can be edited, copied, and shared within your organization. Any saved query can be run from this screen by checking which method you would like to run (Search, Report, or File) and clicking on the Query Name. If you are new to Extended Query, this will become clearer to you as we proceed.
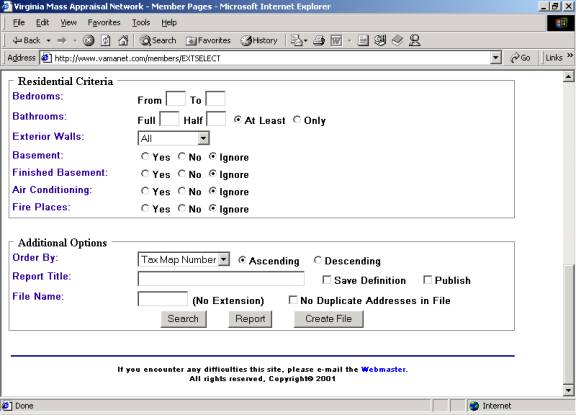
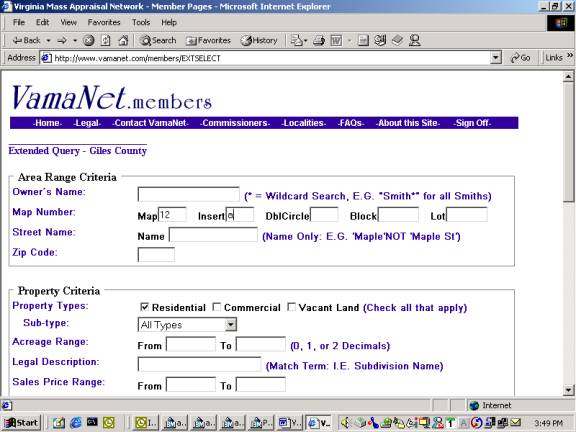
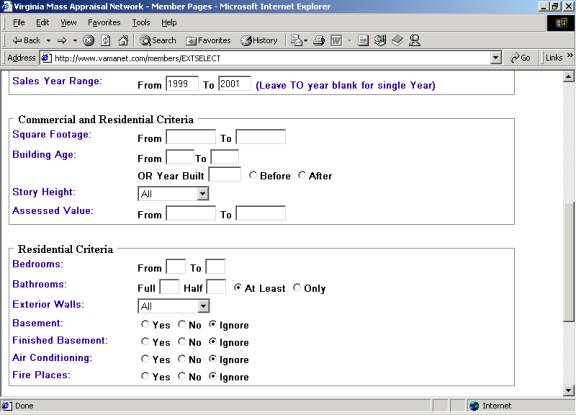
- To start a new query, click on the “New Query” button and you will be taken to the Extended Query screen. Because there are so many options, the following 3 screen shots actually represent one screen:
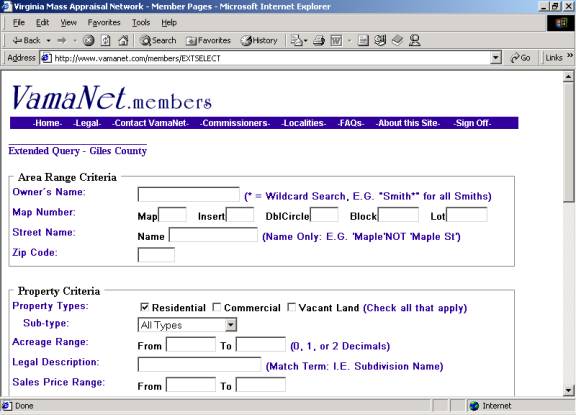
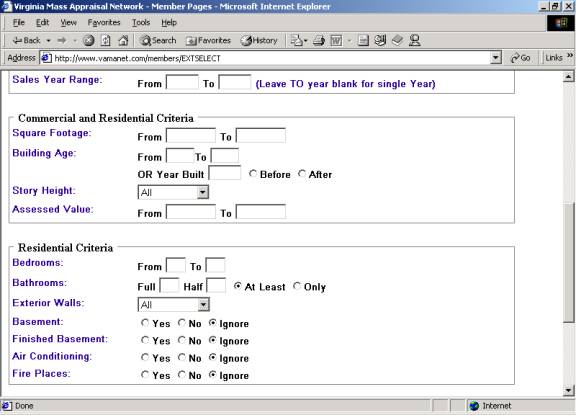
5. You can quickly see that there are many selections. Some of the options are in drop down boxes such as Story height. Most of the ranges will auto-populate, which means that if you select only one side of the range the system will fill in the other side. For example: if you want properties with an acreage greater than or equal to 10 you would simply put 10 in the “Acreage Range From” field and let the system fill in the to field with a maximum value. The notable exception to this rule is the “Sales Year Range” selection. If you only populate one field then only a single year will be considered. Also noteworthy is the fact that unlike “Search Property Records”, the Extended Query property type default is residential only. You may select any combination of the three property types.
Additional Options – The additional options really extend the power of the query tool.
1. The first item is the “Order By” drop down box.
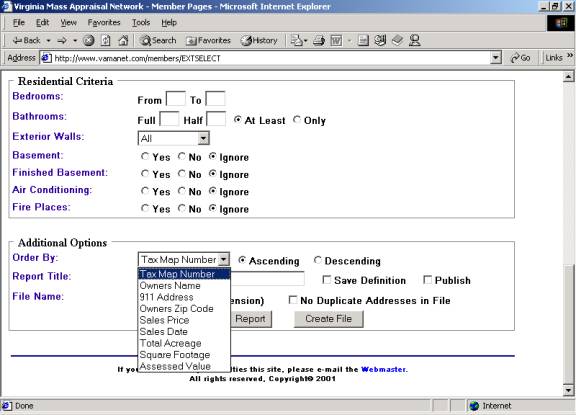
You may choose to order your query by any of these selections. Additionally, you can reverse the order of the results by selecting “Descending” instead of the default “Ascending”. This feature is especially handy when doing sales analysis: you can order your results by Sales Price with Descending selected and the highest sales priced properties in your results will be at the top.
- The second item is the “Report Title” line. If you want to save a query, you must name it and check the “Save Definition” box like so:
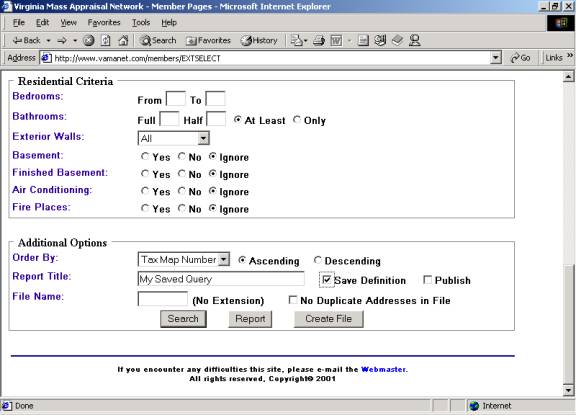
In order to complete the save simply run one of the report options covered in the next section. If you wish to make your query available to the other users in your office you must also check the “Publish” box. The third line “File Name” will be covered in the “Creating Files” section.
For purposes of an example, here are some screen shots of the Query I will use to demonstrate the three Query Options:
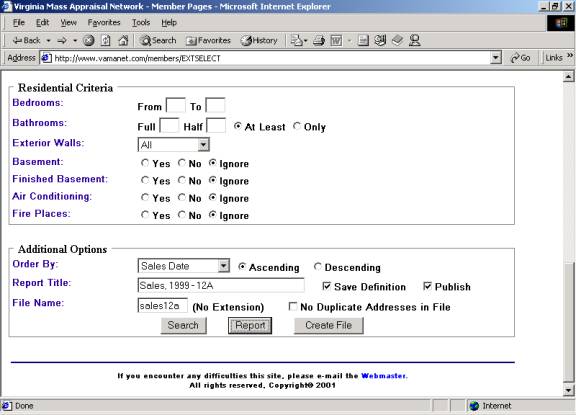
You will see that I have selected the following:
Map 12, Insert A
Residential Properties (the Default)
Sales Year Range 1999 – 2001
I have selected Order By Sales Date which should show me the results in sales date order.
I have also given my report a name and checked Save Definition. I have also checked Publish so that my fellow employees can use this query as well. Again this step is completely optional.
This query only returns 3 properties, so it is ideal for demonstration purposes.
Query Types
The Extended Query tool gives you three ways to use your query once it has been created. You can perform regular detailed property searches, run a result set report listing, or create a downloadable spreadsheet file.
- The Search option – The search option is essentially the same as the “Search Property Records” option from the Home page with one major difference: only the properties matching your search criteria will be listed in your search and the search will be ordered as your query specifies.
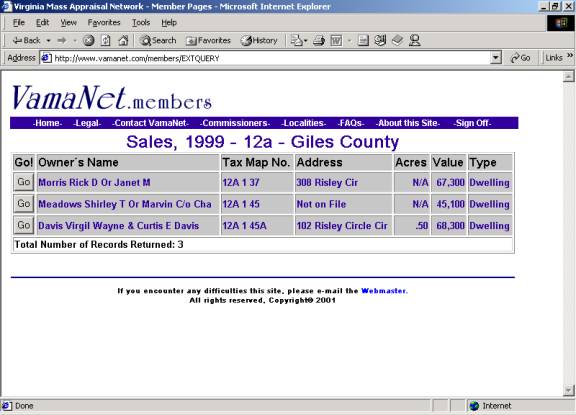
Note that the Report Title I filled in has become my page header. From this point I can click the “Go” button next to any of these properties to view the detail.
- The Report option – The Report Option gives you a snapshot of the critical information for each property: Owner’s information, Location information, Legal Description, Property information, and Sales information.
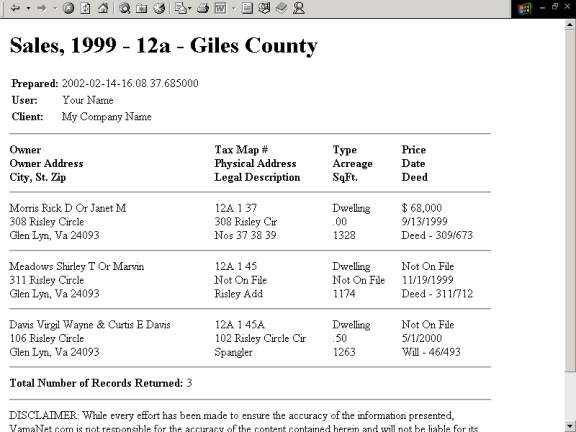
*I expanded this screen to capture the critical pieces.
Like the Detailed Property Report, the Query report is designed for desktop printing: all black and white and should fit on 8.5 x 11 paper.
- Creating
Files – The final option is to use your query results to create a
file. The files are delivered in a
spreadsheet readable format that is very useful in Microsoft Word and
Excel. It is specifically designed
for use with Microsoft Word’s Mail Merge feature for creating Form
Letters, Mailing Labels, and Envelopes.
Clicking the “Report” button will create the file and give you a
link to download it off the website:
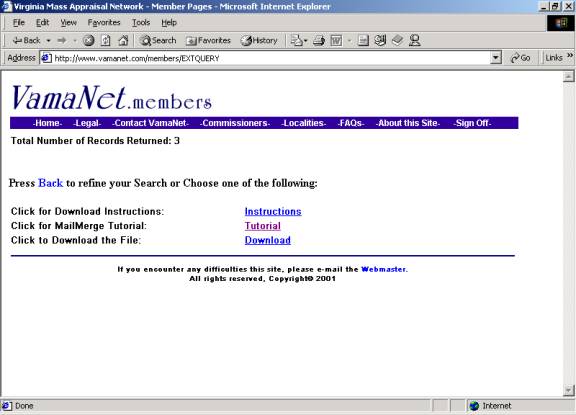
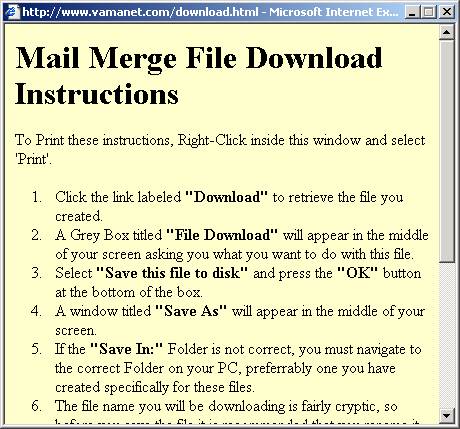
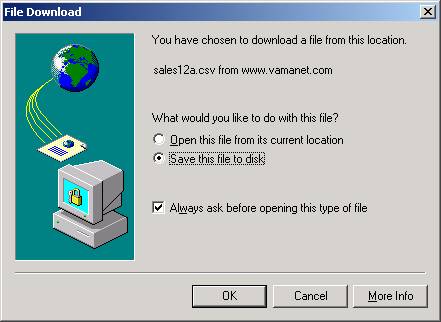
The “Instructions” link shows you simple file download instructions.
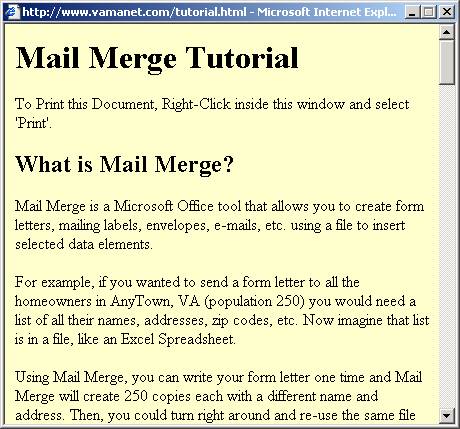
The “Tutorial” link will bring up a beginning tutorial in Mail Merge. If you are unfamiliar with Mail Merge, this would be a decent place to start learning how to use the feature and includes additional links to other web resources. Covering Mail Merge and how to use the file on your system are beyond the scope of this document.
The “Download” link will begin a standard web download of the file you just created. Be sure to pay attention to where you save the file so that you can find it later.
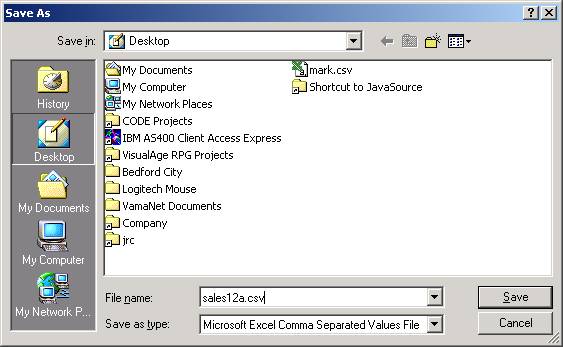
*Note that the file name is the same as the one we entered in the “Additional Options” box of our Query.
Once the file is downloaded it can be opened through Microsoft Excel to view the data. Fields include but are not limited to Name and Address Fields, City, State, Zip, and more.
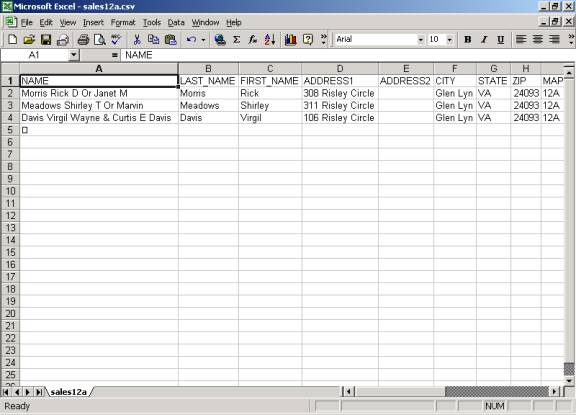
You do not need to do this step! The file is downloaded in a .CSV format which Microsoft Word can read when performing Mail Merge operations, so you can go directly from Download to MS-Word and begin the Mail Merge process.
The last option to discuss for Creating Files is the “No Duplicate Addresses In File” option. If you leave this blank and a property owner owns several properties in your Query results, you could inadvertently send that owner several copies of the same mailing. This is an unnecessary expense for you and could be annoying to the owner. If you check the box next to “No Duplicate Addresses In File” then the download file will not contain duplicate addresses.